Sunday, March 31, 2013

Easter Saturday in the kitchen

Today it is Easter Sundy and I've been baking and cooking for 3 days. First I always make  Pasta Fagioli (pasta and beans) every Good Friday. And I always make Easter Bread every year as gifts for friends and family and of course don't forget my husband. This is one of his favorites going way back when his Mom made it. I have tweaked the recipe and it's a big hit with everyone.  Just tastes like Easter!
This is a great way to enjoy your Pasta Fagioli

 
1 medium onion
2 stalks of celery
1 1/2 teasp. ground cloves
2-14.5oz cans dark red kidney beans
1 cup pasta (ditalini or any small pasta)
1-2 tbls. tomato paste
1 large handful of grated parmesan cheese
salt and pepper to taste

Saute onion, celery and cloves in 2-3 tbls. of olive oil in a medium saucepan till onion are translucent(5 mins). Add kidney beans with liquid and cook on low to medium heat for approx 30 mins. (do not let it get dry but some of the liquid will cook away) While this is cooking start a large pot of water to boiling, add one cup of pasta and cook until al dente (follow instructions on box) Take out 4 cups of water and keep on the side. Add kidney bean mixture to the pasta pot with 1-2 tbls. of tomato paste. Add salt and pepper to taste and a heaping handful of grated parmesan cheese.  Cook just until all the flavors have melded together. Serve with crusty italian bread and more grated cheese on top.  Yum!
(The reserved water can be added if there is not enough liquid after adding all the ingredients or you can use chicken stock which gives even more flavor)

Next up Easter Bread. This is a great recipe and definitely worth the time.

1 cup sugar
6 large eggs
1/2 cup vegetable or canola oil
1/2 cup warm water
2 pkgs. active dry yeast (I use rapid rise)
5 cups flour
3 teas. anise extract
Icing
3 cups confectioners sugar
1 tbls. butter
Warm water (just enough to bring sugar together)
Food coloring (one or two drops of your favorite color)

First, in a small bowl add 1/2 cup of warm water and 2 pkgs. yeast with a pinch of sugar. Stir till dissolved and set aside for 10 mins. till it almost doubles in size. In a blender add eggs, oil and sugar and blend until yellow and creamy. Then in a free standing mixer add flour to the bowl and make a well in the middle. Add the egg mixture, anise and the the proofed yeast. Mix just until all ingredients pull together.  (If you don't have a free standing mixer you can add your flour to a large pot with a well, pour your liquid in the middle and pull the flour from the sides till mixed. This is a very sticky dough at first so I find the mixer works better but I did it the old fashion way for years) Flour a board or your counter and put dough on the counter and knead till smooth and together adding a little flour if needed to knead as this is a very sticy dough. (Not too much though) In a very very large bowl or large pot wipe with oil and place your ball of dough in the middle. Wipe top of dough with a very small amount of oil cover with saran wrap and put in a warm place for 8-10 hours. Dough will rise to the top of the pot.
Once the dough rises, punch down roll into a log and cut into 3 uniform parts. Form into small loaves (will make 3 loaves) Add to greased loaf pans and cover with towel and let rise again in a warm place. (I let them rise overnight and cook in the morning)
Bake at 350 degrees for 15-20 mins. depending on your oven. I keep checking it till it sounds hollow and then it's done!
(Shown is my braided wreaths that I love to make as gifts.  There fun and easy to make and are a nice presentation. Start with one portion of dough. Divide again into 3 equal pieces. Roll each peice to about 20 inches long. Press the tops together and then start braiding the strands (as you would a childs hair) When you get to the end keeping it flat bring the ends together, press lightly to keep together and put into a greased cake pan. (Keep an eye on these as they bake a little faster than the loaves)
Once cooled make confectioner icing and frost each bread and sprinkle with sprinkles.


I hope everyone has a joyous holiday with your family and friends. See you next time!

Saturday, March 16, 2013

My New Favorite Thing

Hi all!! Two weeks ago I decided to make Pizzelles. My daughter gave me a Pizzelle maker for Christmas (something that I have always wanted) and I finally had the time to try it out. Now this iron came with two boxes of all ready to go Pizzelle mix so I thought for the first time I would use that to make it easier. But I also wanted to make some Cannoli's (my favorite) so I thought I would try this also, being the daring person that I am.
My new favorite toy!
 
So I went on the food network.com and found this fabulous recipe for the filling. (If you want the whole recipe go to http://www.foodnetwork.com/recipes/alexandra-guarnaschelli/homemade-cannoli-recipe/index.html)

Filling:

  • 2 cups ricotta cheese, preferably whole milk
  • 3/4 cup powdered sugar
  • 1 teaspoon ground cinnamon
  • 1/4 teaspoon allspice
  • 1/4 cup heavy cream
  • 1/4 cup small semisweet chocolate chips
  • 1 lemon
  • Powdered sugar, for dusting
For the filling: In a medium bowl, whisk the ricotta until smooth. Sift in the powdered sugar, cinnamon and allspice. Mix to blend. In a separate bowl (or in the bowl of an electric mixer fitted with the whisk attachment), beat the heavy cream until fairly stiff. Using a rubber spatula, gently fold the cream into the ricotta mixture. Stir in the chocolate chips. Lightly zest the exterior of the lemon and stir it into the ricotta. Refrigerate for a half hour to an hour. Then use a pastry bag with the largest tip to fill Cannoli's.
 
Now the recipe that came with the iron says to wrap the hot Pizzelles around a metal tube to shape and then deep fry. As I am always trying to find the lighter side of things I decided not to deep fry but just wrap and cool before filling.
 
Turned out pretty good don't you think??
 
So I was going to a very good friends house for dinner this night and thought what a treat it would be to take some Cannoli's and Pizzelles. And may I add this mix tasted great. So I filled the Cannoli's with this yummy filling recipe and added some regular Pizzelles to the dish and what a big hit!
(Do not fill the Canoli's till your ready to serve as they will get soft and not stay firm, lesson learned)
 
Don't you just want to eat one!
 

I had so much fun making these that I made them for my daughter in law Jenn's Jewelry demonstration the next day and what a hit. The Cannoli's were gone in 10 minutes and the rest in 30 minutes. A definite make again recipe!!
 
Thus, my reason for the name of this blog "My New Favorite thing" Thank you Christa (my daughter) for bringing this happiness into my life.
 
And to incorporate my painting, which is another favorite thing that I love to do I am showing a nice dish to serve them on for Easter.
 
Give them a try, your gonna love them!


Saturday, March 2, 2013

A Sunny Day in Pennsylvania

Hi everyone, it is Saturday and we are finally getting a nice weekend here in Bucks County,PA!
It sure does make me feel like painting. I am still on the animal print kick and I don't know why. Probably because it's different from my usual painting and I am trying to think outside the box (so to speak)so here are some of my newer designs.
As you can see I am trying to improve my pictures by adding props. What do you think, comments welcome!
Yep, same prop different setup!
I just started painting on candles and I love it. It's so much more different than painting on glass. You really have to be careful you don't touch the wet paint as you go around. Must be done in stages so it take a little longer but very rewarding. I love the hot pink.
 
Thank for stopping by. I will leave you now to go and make Cannoli's to bring to a friends house for dinner tonight! I have a few good recipes for these and will let you know in a future blog which one I chose and how they turned out. Wish me luck!!


Sunday, February 24, 2013

A Rainy Day in Bucks County, Pa

So yesterday was a rainy day in Bucks County, Pa. Wasn't feeling much like painting so I did the next best thing..........I cooked. What did I cook..........Lasagne soup of course.  This has become a favorite in my family and the recipe was given to me by a dear friend Carole and I would love to share it with you.  First a picture of how great it looks and then the recipe so you can try it and know how great it taste!

 
Lasagne Soup
1 lb. ground italian sausage
2 cups chopped onions
1 cup sliced or diced carrots
1 cups sliced mushrooms
2 Tbls. garlic minced
4 cups chicken broth
1 can chopped italian style stewed tomatoes (14.5oz)
1 cup mafalda pasta (or any pasta you like)
2 cups fresh spinach chopped
Serve soup over & garnished with
1 cup provolone or fresh mozzarella diced
1/4 cup parmesan shredded
4 tsp. thinly sliced fresh basil
 
Brown sausage in a large pot or saucepan over medium-high heat. Add onion and carrot; saute 3 minutes. Stir in mushrooms and garlic; saute another 3 minutes.
Add broth and tomatoes; bring to a boil. Stir in pasta and simmer until cooked, about 10 minutes (or according to package directions) Add the spinach and cook about 1 minute or until wilted.
To serve place cubes of cheese in each serving bowl, then ladle soup over to melt. Garnish with parmesan and basil.
Add a salad and crusty bread and you have a delicious dinner in no time at all!!
 
Now as if that wasn't enough I also made cookies for dessert. These cookies take a little time but believe me, they are well worth it!
Italian Sprinkle Cookies
6 eggs
5 Cups all purpose flour
2 Cups confectioners sugar
2 tbls. plus 1-1/2 tsp. baking powder
1 cup vegetable oil
1 tbls. almond extract
1-1/2 tsp. lemon extract
Glaze
1/2 cup warm milk
1 tsp. almond extract
1 tsp. vanilla extract
3-3/4 Cups confectioner sugar
Colored sprinkles (jimmies)
 
In a mixing bowl, beat eggs until light and foamy (about 5 minutes) Set aside. In another mixing bowl, combine flour, sugar & baking powder, stir in oil and extract. Gradually add eggs (dough will be stiff). Roll dough into 1 inch balls. Place on ungreased baking sheets. Bake at 350 for 12 minutes or until edges begin to brown.
For glaze: combine milk & extracts in a large bowl. Add sugar, whisk until the glaze is smooth. As soon as cookies are removed from the oven, quickly immerse two or three at a time into the glaze. Remove with a slotted spoon or fingers. Place cookies on wire racks to drain. Quickly top with sprinkles. Let dry 24 hours before storing in airtight containers.
Yield: 7 dozen
 
These are definitely worth the time to make and will surely be a crowd pleaser at your next event!


Friday, February 22, 2013

Getting ready for baseball season

TGIF..........I thought today would never end at work! All I could think of was my new blog and what I would write about. Since you already know that painting is my passion you should also know that I like to bake and cook. So I was thinking, why not publish a great recipe along with my pictured glassware. After all that's why people buy it......hopefully to use it right!?!

I spoke to a customer today that wanted to order two chip and dip sets hand painted with the Phillies sports design. She is giving each one as a shower gift. Guess the recipient is a great Phillies Phan and who isn't. So in honor of the upcoming Phillies season I am posting a few of my Phillies designs for you.
Spicy Hummus Dip
1(14.5oz) can chickpeas (garbanzo beans) drained
2 rounded tbls. tahini sesame paste
A drizzle of extra virgin olive oil
1/2 tsp. crushed pepper flakes
1 tsp. ground cumin
1 tsp. ground coriander
1 clove garlic
course salt
1/3 lemon, juiced
Pita breads, grilled & cut into wedges for dipping
Combine beans, tahini, oil, pepper flakes, cumin, coriander, garlic, salt and lemon juice in food processor bowl and grind into a smooth paste. Transfer into our small dip bowl and surround the warm pita wedges on the plate.
 
A nice cold beer on opening day?
 

For the wine drinker
 
Cranberry-Mango Wine Cooler
1/2 C. cranberry-mango juice (such as ocean spray) or any cranberry juice
1/2 C. orange juice
1/2 C. Merlot or other dry red wine
2/3 C. seltzer water
2 lime slices
2 orange slices
Combine the first 4 ingredients in a pitcher, serve over ice. Garnish with lime & orange slices.
 
 
Magarita's anyone!
 
And there's much more with cookie jars, coffee mugs and pilsners too. If the phillies aren't your team I can paint whatever your favorite team is.  There is a full sports line at Morning Glories. So get ready for baseball season and "GO YOUR FAVORITE TEAM!http://www.etsy.com/shop/morningglories1


Thursday, February 21, 2013

My first day blogging

I am new to this so bear with me. I promised myself that one of the things that I wanted to do for 2013 was to start a blog about my passion for painting on glass, so here goes!!

One day I was watching the public broadcasting station on TV and I saw this beautiful women demonstrating how to paint with a technique called one stroke painting. Now I have been painting for 30 some years now (oops! I'm giving away my age) and have painted with oils, acrylics, waterbase just to name a few and had never seen anything like what she was describing. But as I watched her create these beautiful designs and making it look so easy I thought to myself, I can do that.

So I went out and bought a few canvas, paint, brushes, one stroke painting books and thought I'm ready now, I can do this! WRONG............it was not as easy as it looks. So I went to my local craft store and bought a video on this one stroke painting. You have to be able to follow a video right??
WRONG.............it definitely was not that easy. So I put it all away and thought I would give that up and try something else. But it kept nagging at me and then I saw Donna Dewberry again on TV and thought I'm gonna learn this.

So back I went to my local craft store and lo and behold they were giving classes on one stoke painting. A 3 week class which I signed up for right away. I was taught the right way to hold my brush, the pressure to use to get those beautiful strokes and how to blend the paint. My teacher told me I had a real gift and that I should try to persue this and to practice, practice, practice. And so I did for a year or so. Then I started making hand painted gifts for all my friends and family. They would tell me "you should sell your glassware, it is so beautiful". That was 9 years ago and here I am today with a lucrative business and doing something I love to do.

So never give up on your dreams because thoughts and dreams become things and can bring you much joy when it's something you have a passion for.


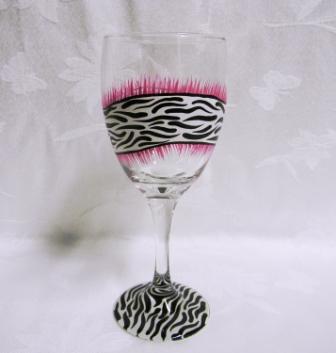
This is something new I just created, I'm feeling animal print right now and I love the way it turned out. Animal print is suppose to be real hot this Spring so think animals when you creating your favorite crafts this year.


Zebra and hot pink is always a great color combination!


Margarita anyone!!
 

You can find this great painted glasses at http://www.etsy.com/shop/morningglories1
 
So I think I'm gonna like this blogging once I get the hang of it. Hope you'll tune in to see how I progress..........I'm just brimming with ideas and would love to here from you also, till next time
Happy Painting!!!